
How to Export/Import a MySQL database
Suppose you want a database backup of any instances ‘ in AWS Lightsail WordPress ‘ through putty or SSH. For that, first, we need to create an instance. In this article, I am assuming that you already have a WordPress instance in Lightsail.
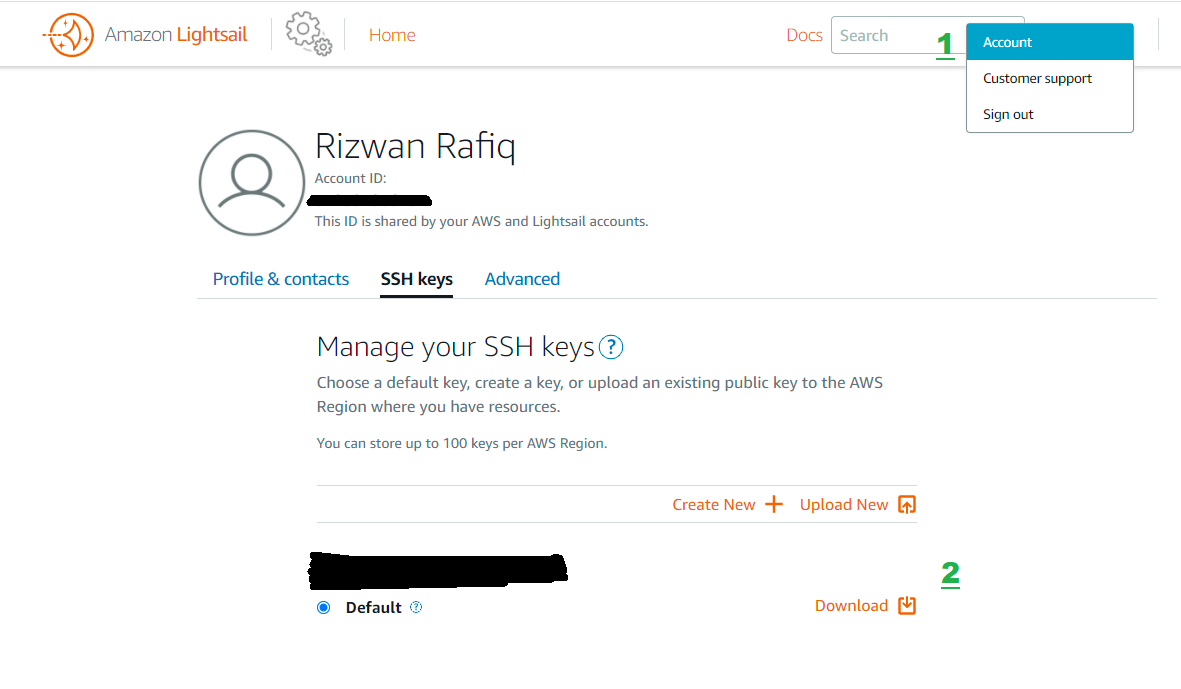
1:Download Instance SSH Key
So you need to download the SSH key of this instance. This is an essential step. Follow the below screenshot to download the SSH key in Lightsail.
2:Install PUTTYgen
Download PUTTYgen through below mentioned link (For SSH), and install this file into your system.
Now Open PUTTYgen and click on ‘load’ and select the downloaded SSH key file and after that click on the ‘save private key’ file. Save this file with any name with this (*.ppk) extension.

3:Install PUTTY
Download PUTTY through below mentioned link, and after that, install this file into your system.
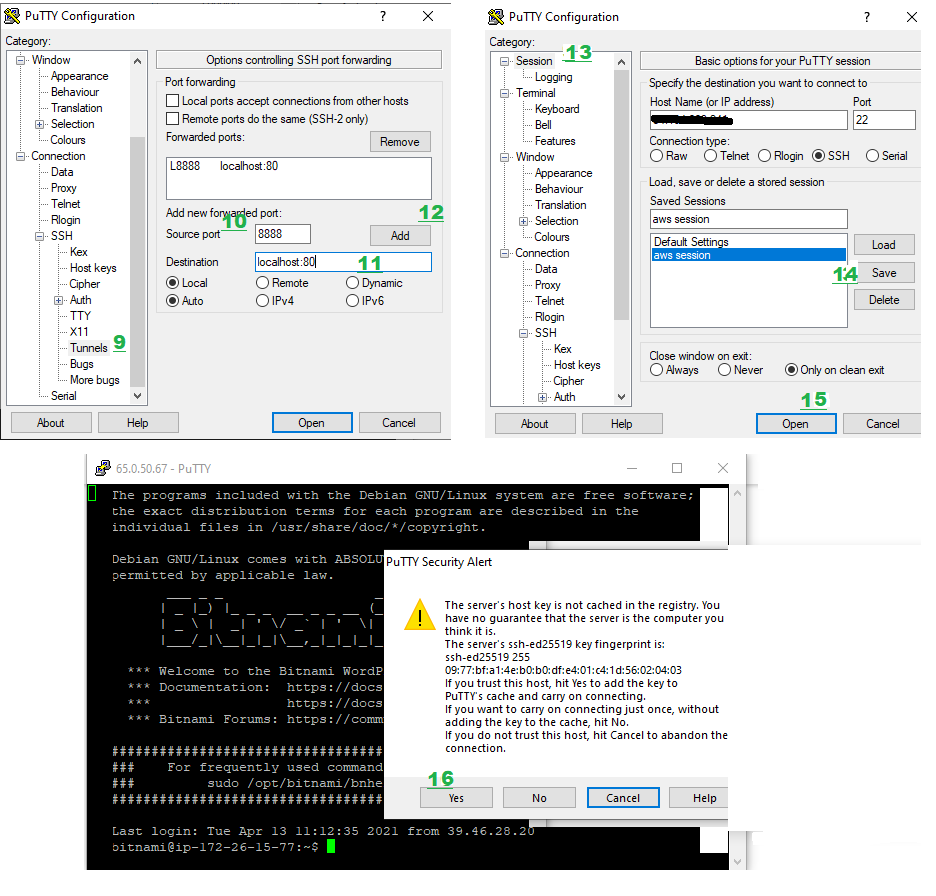
Now, Open PUTTY, in ‘Host Name’ input filed you need to write your Lightsail instance’s Static IP address, now give the name to a session and then save and after that click on ‘Data’ under ‘Connection’ (left bar), write username of your instance in the field ‘Auto-login username’ (bitnami, ubuntu, etc according to the type of instance ), again go to left bar and click on ‘SSH'(click on SSH ‘+’ sign) then click on ‘Auth’, now choose Private Key(*.ppk) file.

OR, If you want to open your AWS Lightsail Instance ‘ PHPMyAdmin ‘ database, and also you want to check if your Instnace database is available in ‘PHPMyAdmin’ or not, then follow these steps;
Go to the left bar and click on ‘SSH'(click on SSH ‘+’ sign) then click on ‘Tunnels’, now add ‘8888’ in the Source post field and add ‘localhost:80’ in the Destination field. Now click on ‘Session’ on the left bar and now choose your last session (in my case, the last session was ‘aws session’ ) then click on ‘save’ and now click on ‘open’ then it will show you a popup and you need to click on “Yes”.
4: Filezilla or WinSCP
Download Filezilla or WinSCP through this link, and after that, install this file into your system.
https://filezilla-project.org/download.php
OR
https://winscp.net/eng/download.php
Open Filezilla/WinSCP to connect to your Instance. I’ll choose Filezilla for this work.
Go to the Edit option of Filezilla > open settings > click SFTP > pick the Private key of your Lightsail Instance (*.ppk).
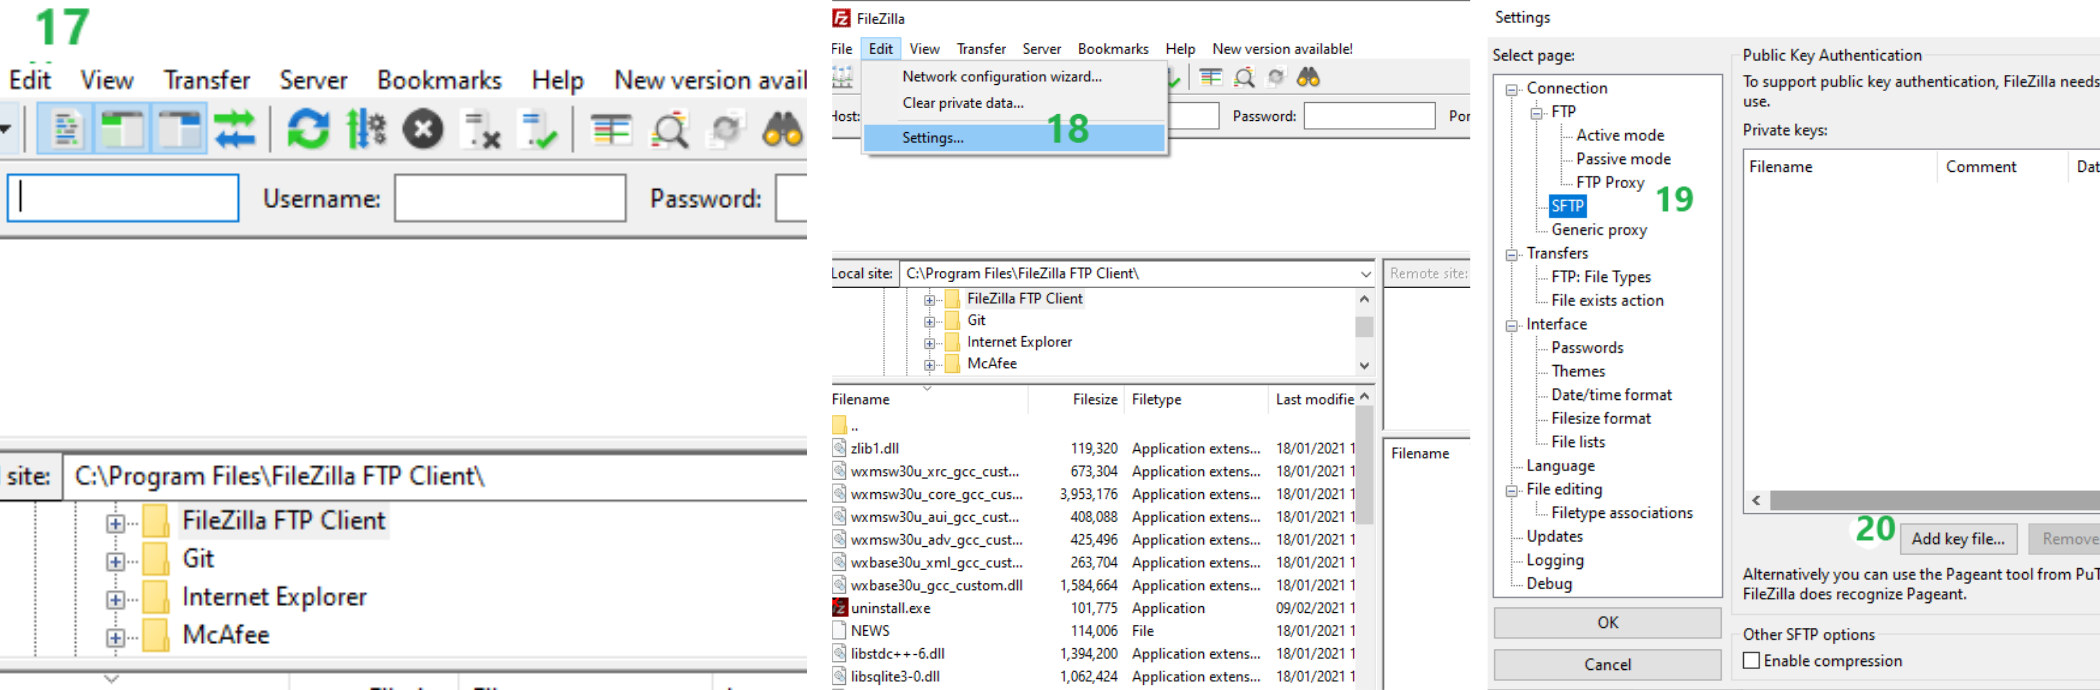
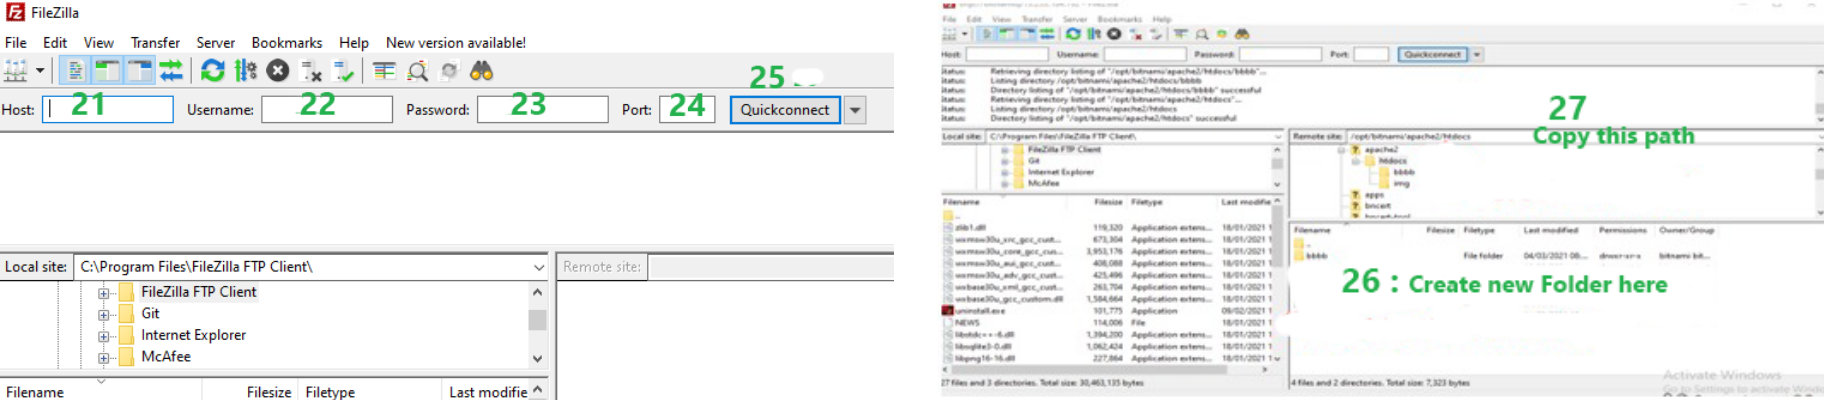
5:Filezilla Connection
After that go back to the main page of Filezilla and Write-host (IP/domain), the username (server name), password (instance password), Port (22), and Quick connect this.
After that, you will see your Lightsail instance directories are showing. Now, create a new directory/folder for AWS Lightsail database backup and also copy the entire path with the new folder.
6:Check Instance Databases through PUTTY
Now back to the PUTTY, write some commands For checking, is this showing all databases & tables of Lightsail instance,
- sudo su
- mysql -u root -p -h localhost (root mean USERNAME OF DB, P mean password)
- show databases; (show all databases)
- use DATABASE NAME; (Backup Database name)
- show tables; (show all tables of your backup DB)
- exit
7:Command for export Lightsail Instance database
- mysqldump -u DATABASE USERNAME -p –h localhost DBNAME –single-transaction –quick –lock-tables=false > Paste Filezilla path where you save backup/filename.sql
Note: Must care for the Angle Bracket inside the Command. Don’t change this Angle Bracket. Otherwise, you can’t take a backup of your AWS Lightsail database tables.
Commands:
- mysqldump -u root -p -h localhost wp_demo –single-transaction –quick –lock-tables=false > /opt/bitnami/apache2/htdocs/bbbb/backup.sql
- enter password
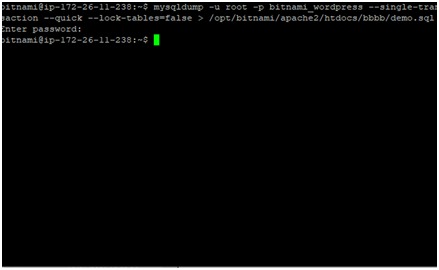
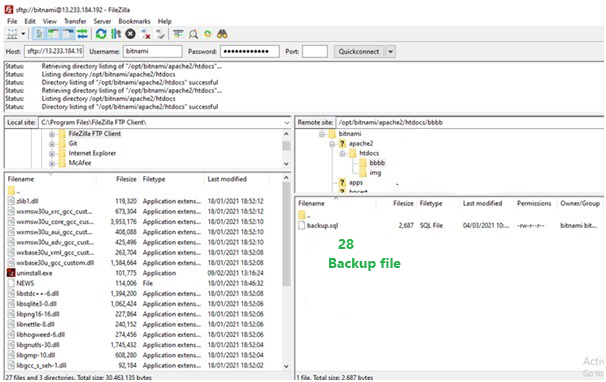
After some time, you will see your database tables will have been created with your given Filezilla path.
Now, you can delete all tables of your backup database from MySQL and after that, you can also check your database backup whether it is imported in MySQL or not.
8:Check Database
Again back to the PUTTY, and write below mentioned commands
- sudo su
- mysql –u USERNAME –P
- Enter Password
- show databases;
- use DBNAME; (backup database name )
- show tables; (now you will see all tables are missing)
- exit
9:Command for import Lightsail Instance database
- mysql -u USERNAME DB -p –h localhost DBNAME –single-transaction –quick –lock-tables=false < Address link where you save backup/filename.sql
Note: Must care for the Angle Bracket inside the Command. Don’t change this Angle Bracket. Otherwise, you can’t import backups of your AWS Lightsail database tables.
Commands:
- mysql -u root -p -h localhost wp_demo < /opt/bitnami/apache2/htdocs/bbbb/backup.sql
- Enter password

After some seconds all tables will be successfully imported.
10:Import Database Tables
Now if you want to check if tables have been imported or not, then you can repeat all previous commands;
- sudo su
- mysql –u USERNAME –P
- Enter Password
- show databases;
- use DBNAME; (backup database name)
- show tables; (now you will see all tables are again showing)
- exit
Related Article: How can we Upload Large Files to AWS S3?


